In this post I’ll show you how to configure a Raspberry Pi to work as a torrent-box that can be even remote controlled: your Raspberry will be able to download torrents all day long if needed!
What I used
- 320GB USB external hard drive self-powered (labeled “HD320G”), NTFS formatted from Windows. This HDD has a folder named “Transmission” in which we will store completed downloads, and inside there is also a folder called “_part” in which we will store incomplete downloads;
- Raspberry Pi 2 with a clean official Raspbian release installed
First setup
Let’s set up our Raspbian environment and prepare everything for Transmission!
- Login. We use “pi” as username and “raspberry” as password;
- Start the UI. By typing startx after login;
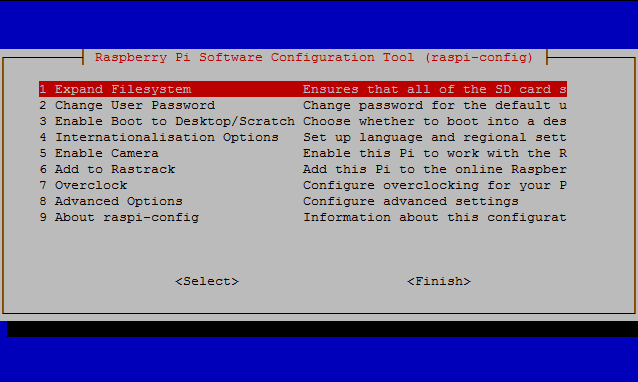
- Configure useful settings. Let’s type raspi-config in the terminal and set the boot to desktop (Enable boot to Desktop/Scratch -> Desktop login as user ‘pi’ at the graphical interface), in the Overclock section choos Pi2 or Turbo (to make the torrent client “smoother”), in the Advanced Options enable SSH (a very useful setting that will allow you to control the Raspberry Pi with a terminal of a another local or remote pc);
raspi-config script allows you to set all your Raspberry’s parameters easily - External HDD power. If it’s the first time that you play with Raspberry you should know that power is a precious resource, it has only 3A with the adapter! So if your HDD has not an external power source you will problaby face to different freezes or crashes on your RPi: my advice is to use an external powered HDD or a Y cable maybe attached to your router USB port (as I currently do). But you can also try to force your micro-pc to deliver more energy than usual to usb ports: on your Raspberry desktop open the Terminal and let’s modify /boot/config.txt by typing:
sudo leafpad /boot/config.txt
A text editor will show up, let’s edit the file by adding the following line at the end of it and save it.
max_usb_current=1
If before that our external HDD didn’t even switch on now it’s working but I must advice you that I encountered freezes and crashes when downloading torrents.
- Installing NTFS utility. Raspbian has not a native support to the NTFS filesystem, so we have to install a specific package. On the terminal:
sudo apt-get update
sudo apt-get install ntfs-3g
- Mounting the HDD. The automount function available on Raspian does not allow us to write on the disk, with the command lsblk on the Terminal we should get to know our disk address:
pi@raspberrypi ~ $ lsblk
NAME MAJ:MIN RM SIZE RO TYPE MOUNTPOINT
sda 8:0 0 298.1G 0 disk
└─sda1 8:1 0 298.1G 0 part /media/HD320G
mmcblk0 179:0 0 7.4G 0 disk
├─mmcblk0p1 179:1 0 814.3M 0 part
├─mmcblk0p2 179:2 0 1K 0 part
├─mmcblk0p3 179:3 0 32M 0 part /media/SETTINGS
├─mmcblk0p5 179:5 0 60M 0 part /boot
└─mmcblk0p6 179:6 0 6.5G 0 part /
In my case I have that my “HDD320G”‘s address is /dev/sda1 , now all we have to do io unmount it and remount with ntfs-3g creating a folder called “hdd_ext”, for example, in media with mkdir:
sudo umount /dev/sda1
sudo mkdir /media/hdd_ext
sudo mount -t ntfs-3g /dev/sda1 /media/hdd_ext/
Now we can finally write on our disk.
Obviously we have to execute these commands every time we boot up our Raspberry Pi, so let’s create a bash script in /home/pi for example, called startup.sh and we will write:
#!/bin/bash
# Stop the transmission daemon
service transmission-daemon stop

# Unmount the HDD
umount /dev/sda1
# Create the mount folder
mkdir /media/hdd_ext
# Mount the HDD on that folder
mount -t ntfs-3g /dev/sda1 /media/hdd_ext

# Restart the transmission daemon
service transmission-daemon start
# Return
exit 0
To make this self-starting we can cite it in the file /etc/init.d/rc.local, writing at the end its path:
./home/pi/startup.sh
Please note that the line 15 is very important (as we will see in this article), lines 3 and 13 will be clear going on.
Installing and configuring Transmission
After setting up the environment we can install Transmission an open-source torrent client. We will install a daemon version, because we have a Raspberry without a display and we want monitor it from remote. Transmission daemon has a good web interface that it will allow us to achieve our purpose.
Installation
sudo apt-get update
sudo apt-get install transmission-daemon
Configuration
To proceed with the configuration we have to stop the daemon (we are obliged to do it, otherwise we will lost any changes to the configuration file). Let’s edit /etc/transmission-daemon/settings.json
sudo service transmission-daemon stop
sudo leafpad /etc/transmission-daemon/settings.json
This is how our setting file will look like, I highlighted important lines:
{
"alt-speed-down": 50,
"alt-speed-enabled": false,
"alt-speed-time-begin": 540,
"alt-speed-time-day": 127,
"alt-speed-time-enabled": false,
"alt-speed-time-end": 1020,
"alt-speed-up": 50,
"bind-address-ipv4": "0.0.0.0",
"bind-address-ipv6": "::",
"blocklist-enabled": false,
"blocklist-url": "http://www.example.com/blocklist",
"cache-size-mb": 4,
"dht-enabled": true,
"download-dir": "/media/hdd_ext/Transmission",
"download-limit": 100,
"download-limit-enabled": 0,
"download-queue-enabled": true,
"download-queue-size": 5,
"encryption": 1,
"idle-seeding-limit": 30,
"idle-seeding-limit-enabled": false,
"incomplete-dir": "/media/hdd_ext/Transmission/_part",
"incomplete-dir-enabled": true,
"lpd-enabled": false,
"max-peers-global": 200,
"message-level": 2,
"peer-congestion-algorithm": "",
"peer-limit-global": 240,
"peer-limit-per-torrent": 60,
"peer-port": 51413,
"peer-port-random-high": 65535,
"peer-port-random-low": 49152,
"peer-port-random-on-start": false,
"peer-socket-tos": "default",
"pex-enabled": true,
"port-forwarding-enabled": false,
"preallocation": 1,
"prefetch-enabled": 1,
"queue-stalled-enabled": true,
"queue-stalled-minutes": 30,
"ratio-limit": 2,
"ratio-limit-enabled": false,
"rename-partial-files": true,
"rpc-authentication-required": false,
"rpc-bind-address": "0.0.0.0",
"rpc-enabled": true,
"rpc-password": "{1a18533b93bd36ff0076eaa38a4f4b72ea40066fTjow.cRu",
"rpc-port": 9091,
"rpc-url": "/transmission/",
"rpc-username": "transmission",
"rpc-whitelist": "127.0.0.1",
"rpc-whitelist-enabled": false,
"scrape-paused-torrents-enabled": true,
"script-torrent-done-enabled": false,
"script-torrent-done-filename": "",
"seed-queue-enabled": false,
"seed-queue-size": 10,
"speed-limit-down": 100,
"speed-limit-down-enabled": false,
"speed-limit-up": 100,
"speed-limit-up-enabled": false,
"start-added-torrents": true,
"trash-original-torrent-files": false,
"umask": 18,
"upload-limit": 100,
"upload-limit-enabled": 0,
"upload-slots-per-torrent": 14,
"utp-enabled": true
}
- At lines 15 and 23 we write our folders paths
- at line 24 we enable the incomplete folder
- at line 47 we enable the web interface
- at line 45 we set that a password is not required to access to web interface
- It’s important to set the line 53 on “false” or we won’t be able to access to the web interface
Final operations
- Give the right permission We have to set that our user identity is the owner of the setting file, let’s do it:
sudo chown pi -R /var/lib/transmission-daemon/info/
sudo chown pi /etc/transmission-daemon/settings.json
- Restart transmission
sudo service transmission-daemon start
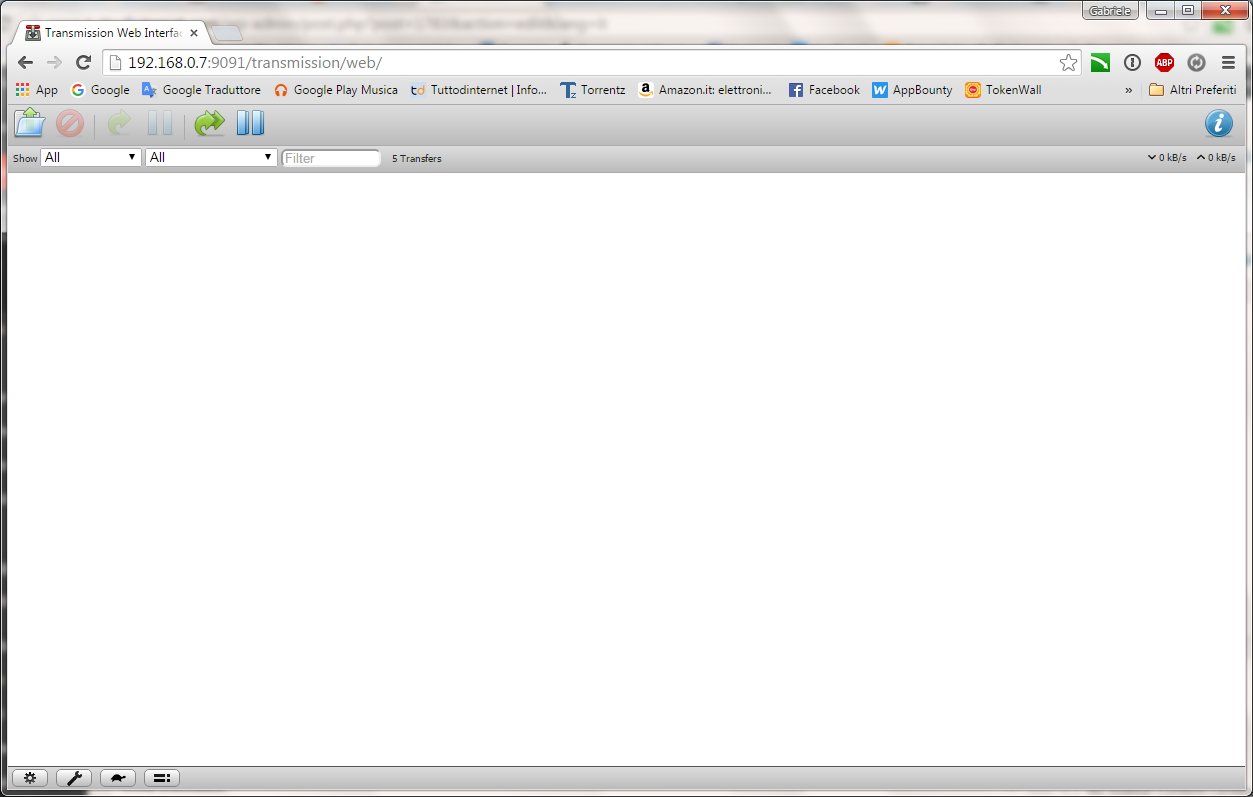
- Now we can access to our web interface by typing on the browser the IP and the port which transmission will listen to (line 49 of settings.json), for example in my case 192.168.0.7:9091. This is how the interface will look like:

Transmission’s web interface From here we can manage every torrent.
IP Blocking
If you want you can also add a list of bad IP to Transmission, mainly p2p filter. We have to click on wrench then Peers then Enable Blocklist and add this link
http://john.bitsurge.net/public/biglist.p2p.gz
Then Update as in the picture below
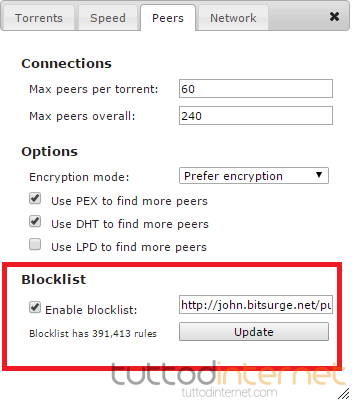
Peers page of Transmission That’s all!Comment this post with your doubts, thoughs and suggestions!